How to Clean Brick and Mortar Walls
You love your brick house, so why wouldn't you want it to look like new?
Brick has been a popular choice for generations because of its rich, timeless look. Yet over the years dirt, grime, and even moss can cause discoloration and make your home's exterior unsightly. Luckily, a pressure washer can restore your brick to its former glory. Following these steps below will have that old brick looking new once again.
This article will walk you through the steps needed to properly clean and restore your home's brick exterior to keep it looking new!
Before You Clean
1. Patch the Mortar Anywhere Cracks Are Visible
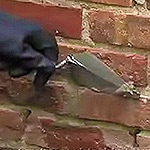
At least a week before you clean, the first thing you'll need to do is patch any damaged mortar joints between the bricks and let it harden for at least 7 days. This will prevent water from seeping behind the brick and causing mold to form in your walls.
We know this will be difficult, especially since your mind is on pressure washing, but it's very important to maintain the structural integrity of the brick and mortar. Follow the instructions included on the packaging for the correct ways to apply the mortar to your bricks.
2. Cover and Protect Outlets and Windows
In order to properly protect yourself and your home, it's very important to cover all exterior electrical outlets, including any exposed electrical ports such as your connections for your air conditioning unit, a transfer switch box for a generator, and any other type of electrical component that could be sprayed with water. Plastic wrap or bags and some tape or rubber bands should do the job.3. Wet the Brick
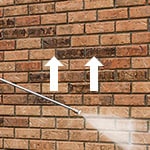
Thoroughly soak the surface of your home. It's important to do this step prior to applying any detergents as it will prepare the brick for cleaning.
*Pro Tip: To ensure an even soaking, spray water from the bottom to the top of your house. This bottom-up motion will help to evenly soak all surfaces without it running down in uneven streams. This is different from what is recommended for cleaning siding, which is washing top-to-bottom to prevent water from getting into the folds.
3. Apply Detergent
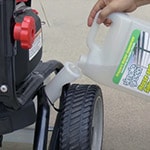
Make sure you choose a detergent for cleaning brick or exterior siding. Using the incorrect kind of detergent can cause dirt to stick to your mortar. Now apply the detergent to the brick, spraying from the bottom up to the top.
Allow it to work into the brick for 5-10 minutes. The key to cleaning brick is less pressure, more detergent. Bricks and mortar are porous, so the detergent and water will soak in a bit. Giving it plenty of detergent and water will help cover all areas where dirt may reach.
Let the soap do its job, loosening and moving the dirt out of the brick. This will make it cleaner and brighter.
4. Brush Tough Stains

For extremely dirty and stained brick, use a rotary scrub brush. This is a less abrasive technique than using water at high pressure. It'll help work the detergent into the brick, and break up tough stains.
Grease, grass stains around the foundation where mow stains, moss, and even tree sap are difficult to remove. Scrubbing these kinds of stuck-on messes with a quality brick and mortar detergent can help to break up and loosen them.
5. Rinse the Bricks
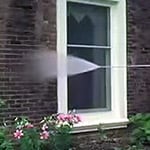
Once the detergent has sat and had time to work itself into the brick, switch to a delicate spray pattern. It's very important that you use a delicate pattern because using too much pressure can and will damage the brick. Again, we recommend starting with a low-pressure setting below 800 PSI, and adjusting slowly to higher pressures if needed.
Unlike before, to wet the brick, spray from top to bottom to remove the detergent and residue. Move slowly, but keep it moving. Don't hold the pressure washer in one spot. Spray in a circular motion over tough stains, and continue moving from top to bottom in mostly sweeping motions to evenly remove dirt.
*Pro Tip: wet bricks can be deceiving, so wait until they are totally dry and assess whether any tougher stains remain, if any spots were missed, or if you have uneven stripes or areas that need a second treatment. Do this before applying a sealant to ensure optimal results. This may mean waiting an additional day or two before checking again.
6. Apply Sealant

Once the brick is clean and dry, the last step is to apply an approved brick and mortar sealant. This will help keep your bricks clean longer. It's like getting the wax and seal coat on your vehicle after a premium car wash. It helps protect it and keep it looking nicer, longer.
The sealant will help prevent acids, oils, greases, and other harmful substances from penetrating the surface. They leave the brick and mortar looking as though nothing's been applied, but when water or other kinds of liquids get on it, they bead up and run off instead of penetrating the brick.
![]() NEXT: How to Clean Your Siding
NEXT: How to Clean Your Siding


